Since we’re skipping a week of the Photo of the Week feature, I thought I’d share a little behind-the-scenes on my fabric photo bookmarks. I took these photos this last summer knowing that someday I’d want to use them in my blog for this very reason. Now I’ve got the perfect opportunity!
Before I started making these bookmarks, I wanted to design something beautiful, unique and more lasting than just a flimsy piece of paper. I have recently gotten into quilting and playing around with printing my photographs on fabric, too. I thought it would be wonderful to be able to combine all of those things into one neat package. The problem I wanted to solve was how to keep a fabric bookmark from being flimsy. One day, at the fabric store I spied a package of heavy duty fusible interfacing showing how it could be used to make things like fabric bowls or boxes. I thought it would be perfect so I got some!
The next step was to put together a collection of small images and print them on fabric. Another trip to the fabric store, with my photos as a guide, and I carefully chose a complimentary combination of fabric and thread.
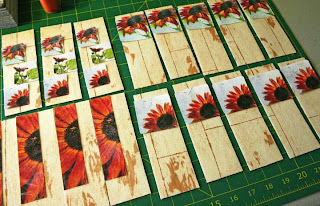
 In this first photo you can see I’ve already fused the interfacing between two larger pieces of fabric and cut the rectangles that will become the bookmarks. I’ve also prepared all my fabric photos by cutting them out from the larger sheet and clipping the corners to make stitching easier.
 Next, I laid out all the cut bookmarks and placed the fabric photos on them until I was satisfied with the placement of each. On these sunflower bookmarks, it took a bit of rearranging until I was happy with them as the pattern of the fabric became part of the overall design.
 Next step was to attach all the little fabric photos to the bookmarks. This part was pretty fun since I could see the final pieces starting to really take shape!
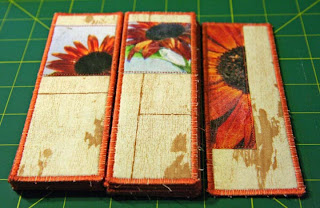
 After all the fabric photos were attached it was time to finish the edges. I set my sewing machine to a tight zig-zag stitch and stitched away. This is the tedious part and where I usually get a bit impatient to be done, but I keep on plugging away!
 Then finally they are all finished! Well, except for cleaning up all the little threads sticking out…
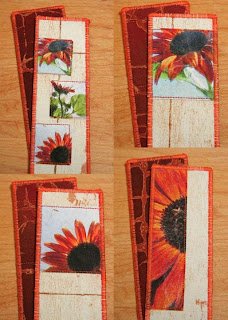
 And the final product is what you see above! I am so proud of these bookmarks and love how they turned out. I wanted to keep one of each for myself, but decided that would be excessive! Instead, I just kept the ones I felt weren’t good enough to put in my Etsy shop. I love to read (when I have the time!) and remember having my favorite bookmarks until they were absolutely falling apart and unusable. I chose not to include tassels on my bookmarks since that seems to be the first part to go on ordinary bookmarks! And after seeing them done, tassels would be just too much, I think.
Along with the sunflower bookmarks, I’ve now got five different bookmark designs completed and they are all in my Etsy shop. Head on over to see them all. In this coming year I may start using other photos from my Etsy shop to make new designs. Which photos of mine would you like to see on a bookmark?

i love that you've explained how you did this … & i love the book marks. Every time i see them it inspires me to be more creative with my work. thanks chica & have a wonderfully merry christmas! xx
I'm glad you enjoyed the post Laura! :) Thanks for your lovely words.
Merry Christmas to you as well!!
The bookmarks are beautiful and very original. Interesting how you print right on the fabric. I was wondering if you used a serger… They cut the edge and make the tight zig-zag at the same time pretty quickly.
Thanks for sharing! Merry Christmas!
Thanks Mag! The sewing machine I use is a basic Singer Prelude. Not much in the way of fancy settings, but it works well enough for me. :)
Merry Christmas to you!
These are absolutely beautiful. Thanks so much for sharing how you make them- a really interesting post!
Wow Jessica, these are awesome, I think you should keep making them for sure! You are so creative and talented! I love reading your blog!