
I mentioned in a recent Photo of the Week post that I’ve been busy preparing 20 pieces to be hung in a local store. My first and biggest challenge was that I didn’t have ANY framed pieces and only a very SMALL budget. How was I going to get 20 pieces matted and framed in 2 weeks? Professional framing, while adding a lovely polished finish to your art, can get expensive very fast! I’ve had some experience working as a finisher in a frame shop, so I knew it was going to be a DIY project. After brainstorming with a friend, I settled on a solution that came out even better than I imagined! I’ll share my process and a few tips with you, but rather than doing it in one long blog post I’m going to split it up over several posts: Sourcing and preparing the frames, assembling/finishing the frames, and finally the finished project installed.
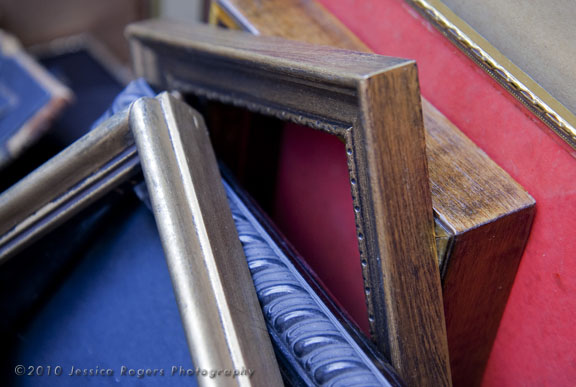 First of all, my goal was to have professional looking framed pieces without investing money I didn’t have. My solution was to shop for frames in second hand stores and fix them up. This takes a bit of leg work and some imagination, but can save you lots in the end. I had to ignore my initial feeling of distaste – they were all different colors/sizes/styles, dirty, and some had ugly art in them still. It was a chaos of miss-matched frames! What you need to keep in mind for this step is that you’ll be painting all of the frames to make a more cohesive look. All you’re looking for are frames in fairly solid shape and with good glass. Once I started looking past the grime and chaos, I could tell the frames I found were still in good shape for use. I found a large box of frames at a local thrift shop for $3.50! After sorting through I discovered only about half of them were usable, but it was also half of what I needed. I continued my search and soon found the rest of the frames I needed. End cost for the frames: $30 + 1 traded print. (That comes out to about $1.50/frame!)
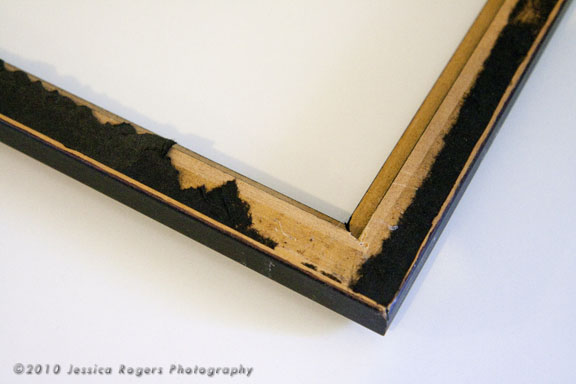
Next step was to clean all the frames. I disassembled all of them, keeping the pieces of glass with their respective frames and discarding most everything else. I wanted a fresh start with these frames. Almost every frame also required cleaning on the BACK (i.e. SANDING) of the frame. You want to make sure every bit of paper/residue/whatnot is completely removed to insure you’ll have a clean finish when you’re done. You’ll want to do this in an area you don’t mind getting dirty or dusty. Outside is best if the weather is decent. Cost: sand paper, glass cleaner, time, and a bit of elbow grease (an electric sander can save you on the elbow grease and some time if you have one!).
 Now the frames were ready to paint. I decided to go with just black and white, but you could choose whatever colors suit your taste/needs. Most of the frames needed at least 2 coats of paint (let dry between coats), other frames needed an extra 1-2 coats. Again, this is a step you want to do outside if possible or at the very least in a well ventilated area. I picked up some cans of spray paint at a local hardware supply store. I decided to go with a matte finish, but you could go with glossy if you like. Cost: $2.00/can of paint and some old newspaper to catch the over spray.
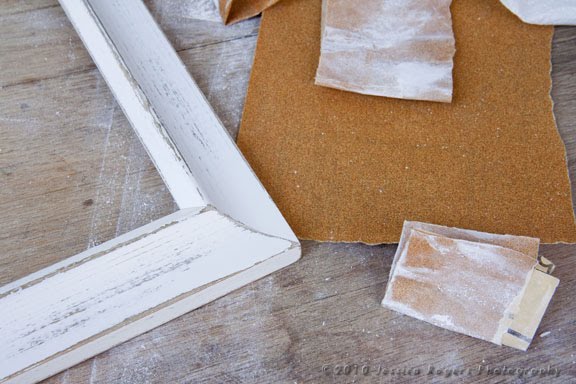
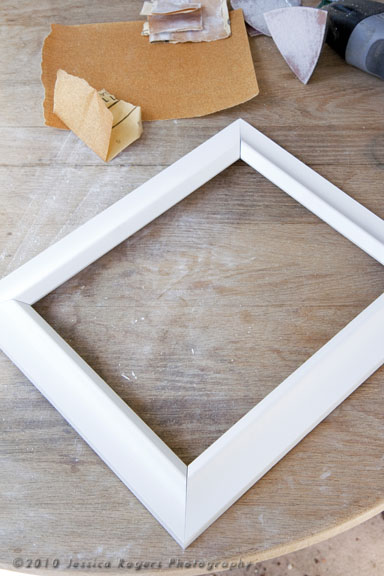
I was pretty pleased with my paint job when it was all done. I was certainly happier seeing a more cohesive look to the group of frames! I let them sit spread out for a full day to make sure they were completely dry. When I revisited them, I decided that some were just a little to “flat” and others had some imperfections in the surface that became more apparent after the new paint job. I decided some distressing was in order! I got out my fine grit sand paper (I used the 150 I had at home) and started sanding. Take your time and have fun at this point – its one of those steps that’s kind of hard to mess up. One thing I tried to do was keep my sanding in one direction, following the length of each side, and stopping at each corner. Also, make sure you clean as much dust off the frame as possible afterward – it’ll keep more out of the frame when you go to finish the piece. Cost: more sand paper and more elbow grease (I opted to do this part by hand for more control on how much paint I removed).
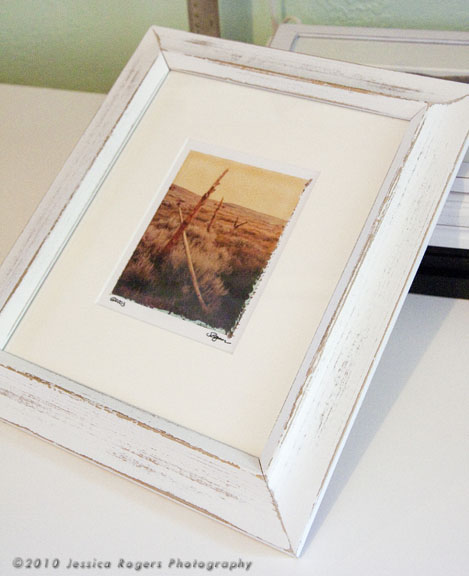
Finally, the frames were ready for the artwork! After taking a peek at what it looked like with one of my matted prints, I was so happy I decided to distress some of the frames. It suited my style of photography perfectly! But this is not where the project ends – the back of the frame is just as important as the front.
Stay tuned for Part 2 in this series where I’ll go into some detail on how I assembled the frames and got them ready to hang.
Jess:
Your idea is fabulous. In fact, I've done the same thing. I like to go to Good Will, garage sales and the like. I found the same thing – they're filled with ugly old art. I painted mine all black (but that's just me). I love your distressed white frames. All so beautiful!!! Whoot! It all does take a lot of time, not to mention all the time it took you to photograph the process and write about it on your blog. Thanks for everything!!
Thanks so much Sue :) I really did have a great time working on this project, even though it took a fair amount of time (that was one thing I forgot to mention in the post). I was half way through distressing the frames when I realized what a great blog post this could make. Yeah, it took time to put the post together too, but now I've got a record of it for myself. Who knows? Maybe it'll help someone else at the same time! ;)
You've really inspired me to have a go at this, Jessica! My local charity shop always has lots of old framed pictures so I'm going down there for a rummage. Looking forward to the next instalment, thank you for posting this :}
oh jessica, these look so great! when i had my show last year i bought a bunch of frames and spray painted them black, and even though i bought them from wal-mart and such, they still ended up being rather expensive! how i wish mine only cost $1.50 like yours… :)
and i love the distressed look! and the white frame is so pretty, now i wish i'd used white instead of black, it's still professional but not so ordinary.
Lesley, I'm so glad you enjoyed my post and much luck to you in your rummaging!
Andrea, when I did the math I couldn't believe it either. Even though the $1.50 doesn't include the other materials (matting, finishing supplies and hanging hardware) the overall cost ended up being much lower than if I had purchased new frames or had a professional do them! And the distressed look came out even better than I thought it would. I just figured if I didn't like it, I could always repaint them. Next time I'm going to try the reverse distressing too – dark with light areas showing through!
Jessica-thanks, love this post. I am currently trying to do this myself. And you know, keeping everything painted the same helps keep different styles of frames looking cohesive…I think that your frames look so good, very inspiring. I think that the frame really is perfect for your photos too-they seem to go hand in hand. It's amazing what a good presentation adds to an image. Job well done! I look forward to reading the next post. Oh, another thing…doing frames this way must add a feeling of accomplishment too. I like that.
I will have to start keeping my eyes peeled…
Thanks so much Anika! Not only has this project given me a sense of accomplishment, but I think a feeling of freedom in a way. I have now proven to myself that it doesn't have to take a lot of money to create a very professional presentation – just a bit of creativity and imagination and a lot of elbow grease! It's definitely awesome to say that, not only did I create the artwork, but I did all the framing myself.
Wow they look like you paid a lot of money for them, they are gorgeous. I hope you will share them when all hung at the store. wow!
I love to see what you come up with, you are so resourceful.
This posting is so helpful! I always have the same problem — how to afford enough frames for a show. I love the look of your distressed frames and agree that they look fab with your photos!
Pam and Beth, thank you! And I will be sharing the final project hanging in the third and final part of this mini-series ;)