

My 2022 Calendar: In Winter’s Shade, explores the hues, textures, and patterns of the season of dormancy. I just finished binding and packaging them and thought I’d share a little behind-the-scenes of that part of the process.
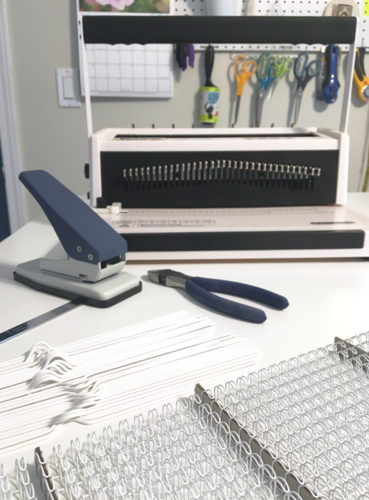
Tools and Parts
In the foreground you can see the wire that gets crimped on to the pages to hold it all together. Just behind the wires, are the hangers, which get tucked inside the wire just before they are crimped closed.
In the middle is a punch that cuts out a half-moon shape to allow room for the pages to turn past the hanger. Wire cutters snip out a portion of the binding wire to make room for the hanger.
In the back you see the binding machine. It allows me to punch all the holes along the edge to be bound, as well as crimp all the wires on to bind the pages.
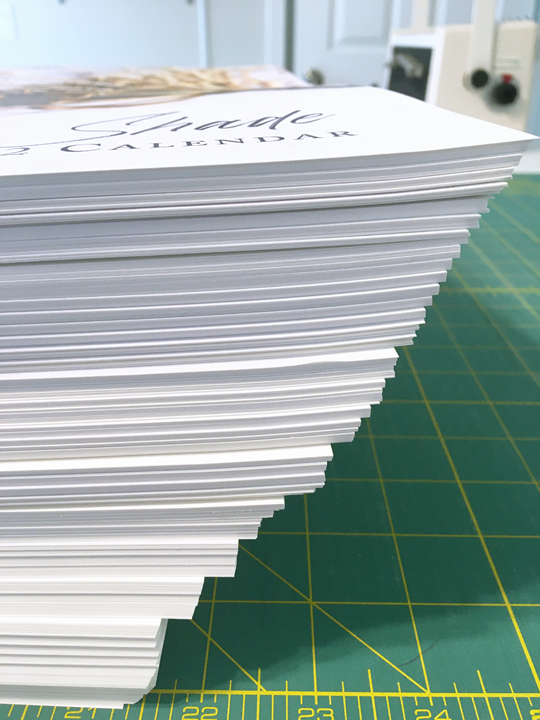
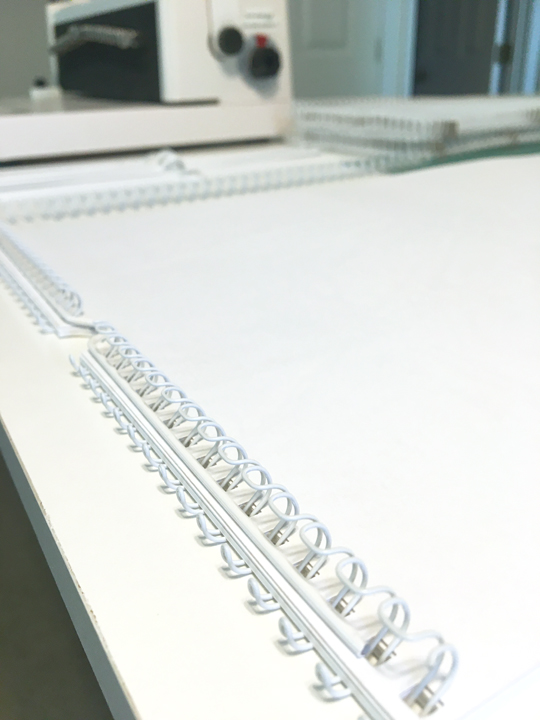
Now it’s time to get all the calendars ready to bind. I work on all of them in stages to be more efficient and to get more consistent results. Step 1 is to punch all the holes.

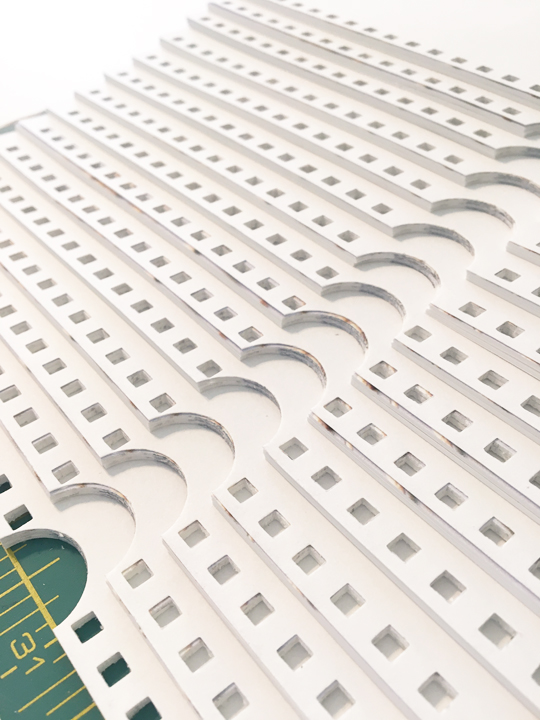
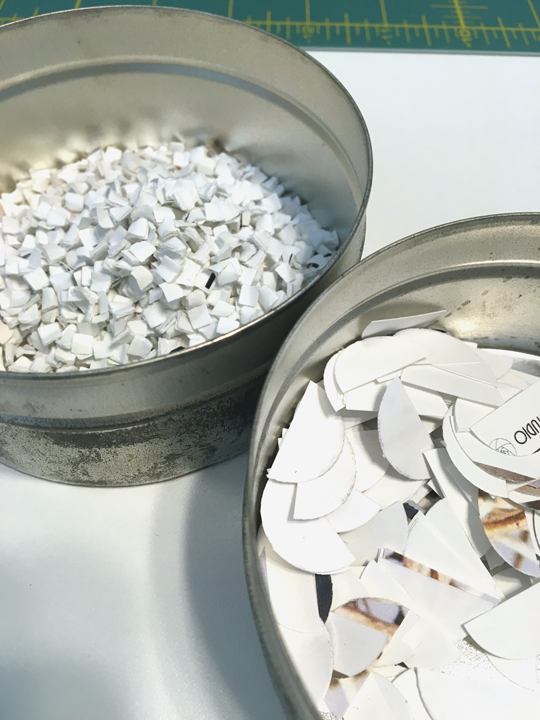
So many holes! But, I have the right tools for the job, so it’s fairly easy once I get everything set as I want it. The half-moon shape gets punched first, then I can use scrap paper to set up the binding machine to punch out all those little holes nice and centered. Periodically, I empty out the chads you see on the right, so the following pages get a nice clean punch. I had 45 copies made this year, so that works out to over 19,000 holes I’m glad I don’t have to do one at a time!
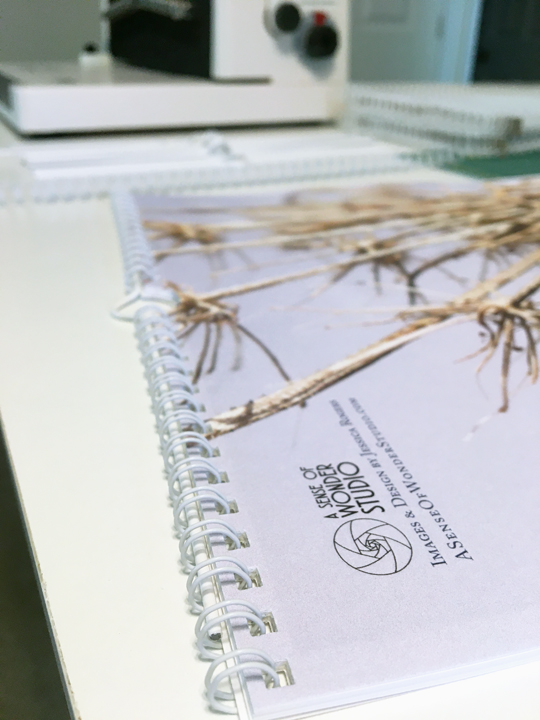
Ready to Bind!
After all the holes are punched, it’s time to add the wire and hanger. I reset the binding machine to the crimping mode, testing on scraps to make sure it won’t crimp too tight or too loose. It’s not in this photo, but I use a small piece of painters tape to hold the hanger out of the way during binding. It does the job of a third hand and doesn’t damage the paper when I remove it.
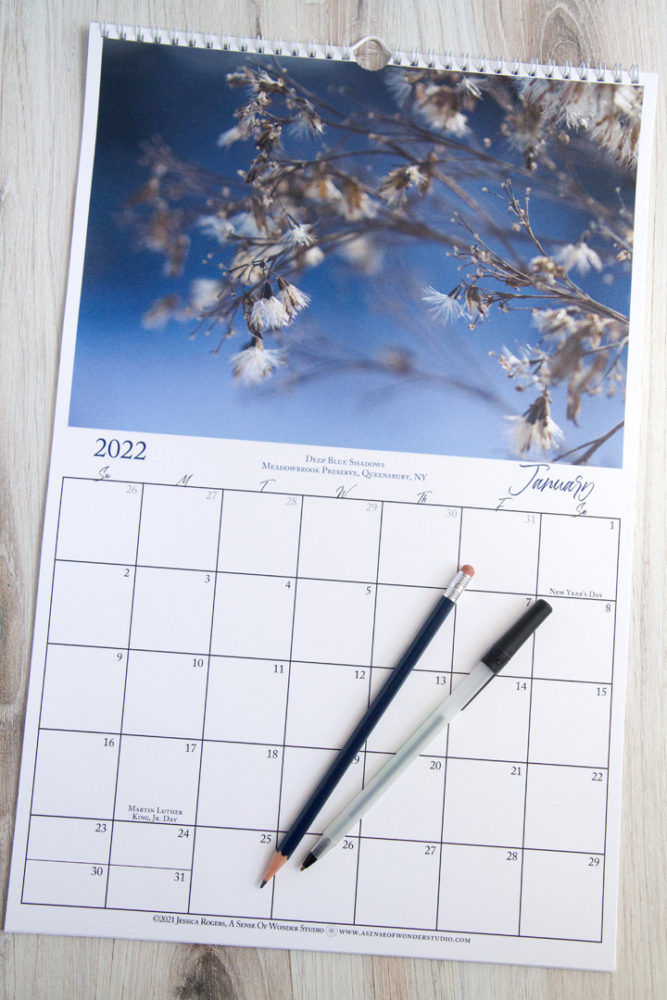
Bound and Ready to Hang
Fresh off the binding machine, you can see how nice and neat it turns out. Top-edge binding allows me to design the grid area with a nice large square (1.5″ x 1.5″) for each day. (A fold-in-half design for a calendar of the same overall size would mean smaller squares to avoid having the fold interfere.) I also love how nice and flat it lays on the wall!

Packaged with Care
After the binding is complete, I tuck a piece of chipboard in-between the pages to keep it flat, and then slide it into a clear sleeve to keep the calendar safe until you’re ready to hang it on your wall.
I hope you enjoyed this look at my calendar binding process. I’ve always found the process of how things are made to be fascinating!
Look at those beautiful blues! 
Back Cover
Now they are all ready for you to purchase! You can get them at the studio or online (and online orders can be shipped or picked up!)